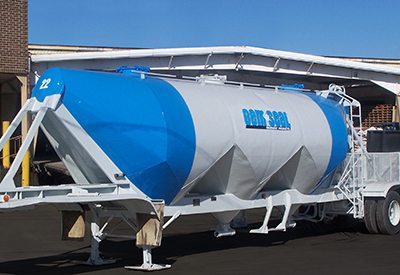
Whatever Old Man Winter may bring, and whenever it happens, be sure you are prepared by checking your equipment now and performing winterization tactics during the cold months ahead.
Check Equipment
By late summer, excess sealer at the top of your tank may become dry from sunlight and heat. Loose chunks of dried sealer can wreak havoc on motors and pumps. If you are seeing unusual build-up in your filter baskets, check the inside top of your sealing rig for buildup. Hold a mirror inside your tank and shine a flashlight aimed at the top. If you notice dried sealer hanging down, it can be removed with a long-handled scraper and then you can fish the material off the bottom of your empty tank.
Perform Thorough Cleaning
Build-up in your tank not only adds weight to your load, but it also takes up space and reduces the volume of sealer you can haul. Repeat trips to your local supplier can be time consuming; but, extra travel can be avoided by thoroughly cleaning your tank during the winter months. (And, if you have been rinsing your equipment on a regular basis during the season to reduce build-up, performing a thorough cleaning in the off season will be much easier.) GemSeal uses air chisels to strip the inside of our tankers down to bare metal and you can do the same. On smaller tanks, place a two-by-four against the side of your tank and pound with a large hammer (this technique is especially effective if your rig has been sitting outside in freezing weather for more than one day). The solid sealer will fall to the bottom of your tank. For those in a warm climate, a worker will need to climb inside the tank and start scraping.
However, before beginning, take the following precautions:
- Make sure your tanks have had time to air out (a room fan placed on top of the tank can aid the process)
- Appoint someone to stand by as a monitor before a worker enters the tank
- The person going inside must use proper safety equipment and dress
- Confined space permits may be required to be OSHA compliant
- Lockout-tagout and confined-space procedures should be followed
Note: If you intend on housing sealer through the winter, your tank should be located in an insulated and heated building. If your tank remains outside and there is the possibility of freezing, insulation or a heating source can help prevent cold weather from affecting the sealer. However, once product has frozen, its integrity has been compromised and you should not use it the following spring.
Create & Complete ‘To-Do’ List
Here are a few items to get you started:
- Clean/flush striping equipment
- Clean melters
- Grease or lube agitator chain
- Drain air compressor tanks and lines of water that may have built up over the season
- Check rig connections, pillow blocks, gaskets, hoses, valves, and tips; if anything needs repairing or replacing, now is the time to do it
- Assess your records – how did your estimates compare to actual yields or time for each project?
- Procure up-to-date SDS sheets on all material you haul*
*Documentation storage tip: cut a three-inch diameter piece of PVC pipe two inches longer than the width of your paperwork; slide in your data sheets and secure both ends with a cap.


 Ken McBride /
Oct 26 , 2016


